


Pitching camp during sudden mountain gusts can put extreme pressure on your shelter frame. A sharp snap or sudden sag often signals a fractured pole section in the middle of a trip. Learning how to fix a cracked tent pole ensures that an unexpected break does not force an early evacuation from the backcountry. Whether dealing with lightweight anodized aluminum tubing or flexible fiberglass shafts, campers can apply reliable techniques to restore structural stability quickly. Knowing the difference between a temporary field splint and a lasting workshop replacement keeps your shelter upright and safe.
When pitching larger family shelters, such as spacious car camping tents, structural stability depends entirely on intact pole sections. A cracked segment weakens the entire frame, leading to uneven tension and fabric sagging under windy or rainy conditions. Carrying basic repair components like dedicated metal sleeves, friction tape, and spare shock cord allows you to address fractures immediately. With the proper repair methods, you can perform quick campsite fixes that withstand variable weather before completing a permanent replacement at home.



Comprehensive Guide to Repairing Cracked Tent Poles in the Field and at Home
A compromised tent pole threatens the geometry and storm resistance of your entire camping shelter. Addressing pole damage promptly prevents ripped fabric panels, pierced rainflies, and sudden frame collapse during turbulent weather. The most practical approach depends on your current location, the pole material, and whether you require an emergency campsite fix or a permanent workshop rebuild. By understanding the distinct steps for aluminum and fiberglass frames, you can handle structural damage safely without abandoning your outdoor plans.
Assessing Pole Materials and Fracture Types
Different pole materials respond to stress in unique ways, dictating the exact repair steps required. Aluminum poles typically crack longitudinally along stress lines or bend severely near connection ferrules when overloaded. Fiberglass poles, in contrast, tend to splinter into dangerous, sharp strands that can puncture tent fabric or skin. Inspecting the break carefully lets you determine whether the section can be splinted immediately or requires containment to prevent further splintering.
Safety is the primary consideration when handling splintered fiberglass sections. Always wear camp gloves or use a cloth barrier to avoid tiny glass fibers embedding into your fingers. If you notice a minor hairline crack in an aluminum tube, do not attempt to bend it back into a straight shape at the campsite. Cold-working stressed aluminum often causes the metal to snap entirely, creating jagged edges that complicate splint installation.
Field Repairs Using a Dedicated Aluminum Splint Sleeve
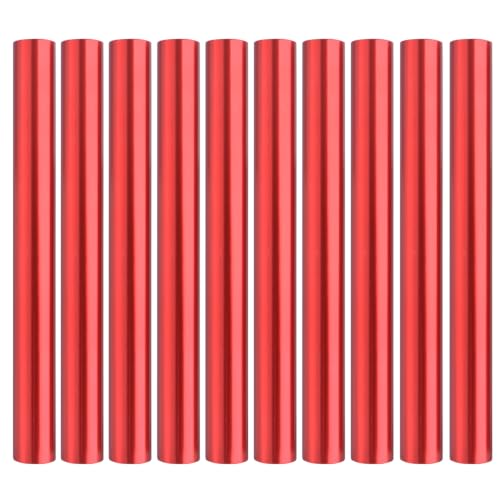
A dedicated pole repair sleeve offers the fastest and most dependable field fix for cracked framing. Most quality backpacking and camping shelters include a short metal tube inside the stake bag for emergencies. Products like the GEAR AID Tent Pole Splint or the MSR Tent Pole Repair Splint Field Repair Sleeve are specifically sized to slide directly over damaged sections. Slide the hollow sleeve over the broken segment until the cracked area rests dead center within the sleeve body.
Centering the sleeve ensures that stress distributes evenly across sound metal on both sides of the fracture. If the sleeve fits loosely over the pole shaft, wrap a layer of duct tape around the pole beneath the splint to build up thickness. Once the sleeve is centered, secure both ends firmly with duct tape or heavy-duty repair tape to stop the tube from migrating. This friction wrap prevents the sleeve from shifting along the pole when flexing under pitching tension.
Ensure that tape wraps remain smooth and flush against the sleeve exterior. Bulky layers of tape can catch on tent pole sleeves, making it difficult to slide the assembled pole through fabric channels. If your shelter utilizes clip-style attachments instead of continuous sleeves, position the splint so it does not interfere directly with a plastic clip. Taking an extra moment to smooth down loose tape edges protects delicate rainfly coatings from abrasion.
Matching Splint Dimensions to Pole Diameters
Sleeve compatibility hinges on matching the inner diameter of the splint to the outer diameter of the damaged pole. Backpacking tents frequently feature slender aluminum shafts measuring between 8.5 millimeters and 9.5 millimeters. Multi-pack sleeves like the TRIWONDER Tent Pole Repair Splint Repair Kit Spare accommodate poles ranging from 7.9 millimeters up to 10.5 millimeters. Choosing a sleeve with an inner opening slightly larger than your pole ensures easy sliding without creating excess wobble.
Larger family camping tents often rely on sturdier poles measuring 11 millimeters to 16 millimeters in diameter. An undersized repair sleeve will not pass over the damaged tube, rendering it completely useless in the field. Comprehensive options like the Mountainsmith Tent Field Repair Kit provide multiple sleeve diameters alongside fabric patches and thread for versatile protection. Checking your tent specifications before packing your repair kit ensures you carry a sleeve that slides freely over your specific pole set.
Improvising Field Splints Without Factory Sleeves
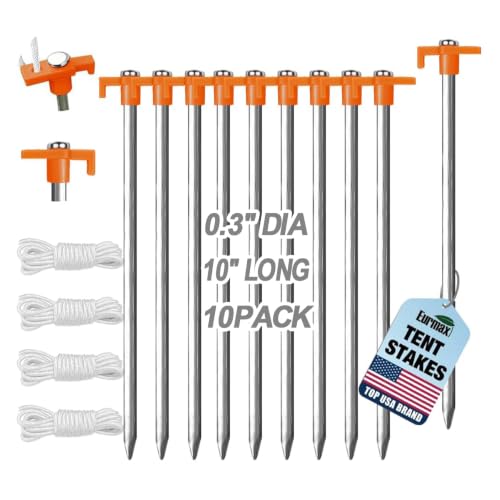
Cracking a pole without a dedicated repair sleeve in your pack requires quick campsite improvisation. Heavy-duty tent stakes, particularly rigid aluminum V-stakes or sturdy shepherd hooks, can serve as temporary external splints. Position two or three straight stakes around the cracked section to create a rigid external brace. The stakes must span several inches beyond both sides of the cracked area to distribute bending forces effectively.
Anchor the improvised splints by tightly wrapping the entire section with duct tape, electrical tape, or durable cordage. Pull each wrap tight to lock the stakes firmly against the pole shaft without allowing rotation. If metal stakes are unavailable, carve straight, rigid hardwood sticks to form an external splint around the fracture. While this bulky solution will not slide through fabric pole sleeves, it works reliably on tents with external clip systems.
Managing Longitudinal Cracks on Fiberglass Poles
Fiberglass poles often suffer lengthwise splits when bent past their elastic limit or stepped on accidentally. Unlike aluminum, which may simply fold or crimp, cracked fiberglass loses hoop strength and continues splitting along the fibers. Begin by wrapping the split section tightly with multiple layers of fiberglass repair tape or electrical tape under tension. Applying pressure constrains the splintered strands, helping the section retain its tubular form under moderate bending loads.
For a stronger campsite fix, apply a layer of rapid-cure epoxy or polyurethane adhesive over the crack before taping. The adhesive penetrates between separated glass fibers, curing into a rigid composite structure that reinforces the factory resin. Allow the adhesive to cure completely according to package directions before re-tensioning the pole inside the tent grommets. If the crack extends close to a metal ferrule, slide a repair sleeve over the glued area for necessary reinforcement.
Permanent Workshop Replacement of Damaged Pole Sections
Field splints are valuable temporary measures, but cracked poles should be permanently rebuilt once you return home. Continuing to camp with a splinted pole increases the likelihood of catastrophic failure during high winds. Permanent restoration involves disassembling the pole assembly, removing the broken segment, and installing an exact replacement section. Sourcing replacement aluminum or fiberglass segments from outdoor suppliers ensures the restored pole maintains proper flex characteristics and strength.
Before ordering replacement sections, measure the outer diameter, inner diameter, and overall length of the damaged piece. Note whether the cracked segment has an integrated metal insert ferrule or a plain hollow end. Using a tubing cutter or fine-toothed hacksaw, you can trim universal replacement sections to match the exact length of your original tent pole. Deburr cut edges thoroughly with a metal file to prevent sharp aluminum burrs from fraying internal shock cords.
Disassembling Sections and Managing Internal Shock Cords
Replacing a broken segment requires untying or releasing the elastic shock cord running through the pole core. Start at one end of the pole assembly and pull out the end tip to expose the cord retaining knot. Secure the elastic cord with a locking clamp or clothes pin before untying the knot so the tensioned cord does not snap back inside the tubing. Once the cord is secured, slide off undamaged pole sections in sequence until reaching the fractured segment.
Keep the removed pole sections arranged in their original order and orientation on a clean work surface. Swapping the position of ferrule ends can alter how the pole fits into your tent corner grommets. If the old shock cord has lost elasticity, frayed, or stretched out, replace it entirely with fresh elastic cord during this rebuild. Restringing a pole with fresh elastic ensures smooth folding and quick assembly during future backcountry pitching.
Reassembly, Proper Cord Tensioning, and Secure Knotting
Slide the new replacement segment into its designated spot on the shock cord alongside the existing pole sections. Threading elastic through multiple long tubes is easier when wrapping a small piece of tape around the cord tip to prevent fraying. Pull the cord through the final end tip, creating enough tension to pull all pole sections snugly together when released. Over-tightening the cord makes folding poles difficult, while insufficient tension leaves pole segments loose and prone to unseating.
Tie a reliable figure-eight knot or double overhand knot at the end of the shock cord to lock tension against the end tip. Release your holding clamp slowly, guiding the knot down into the hollow cavity of the end tip. Test the completed pole by folding and assembling it several times on a carpeted floor or grass lawn. Each ferrule should seat completely without binding or requiring excessive force to align properly.
Root Causes of Pole Cracking and Prevention Tactics
Most tent pole fractures occur during pitching rather than from severe weather alone. The single most common cause is partially seated ferrules, where a pole section is inserted only halfway before bending tension is applied. When a ferrule does not seat completely, the thin outer rim of the female tube bears the entire bending load, causing immediate splitting. Always visually inspect every pole joint along the entire frame before flexing the poles into corner grommets.
Allowing shock-corded sections to snap together violently under elastic tension also produces micro-fractures in aluminum tubing over time. These small dents and flares weaken the joint, eventually leading to sudden failure under wind loads. Poles facing heavy snow loads in cold weather camping shelters experience tremendous strain, making regular structural inspection vital. Pitching your tent into the wind with fully deployed guylines relieves excessive stress from pole arches, preserving the structural integrity of your frame.
Environmental factors like freezing temperatures can make plastic connectors and fiberglass poles significantly more brittle. In sub-freezing conditions, assemble your pole arches slowly to let materials adjust to flexural forces without shock loading. Store poles loosely folded in a dry location between camping trips to prevent moisture buildup and corrosion inside aluminum joints. Routine maintenance and attentive pitching habits dramatically reduce the chances of encountering a cracked pole in the wilderness.
Verifying Frame Integrity Before Your Next Outing
Never pack away a repaired tent without conducting a full test pitch in your backyard or a nearby park. Assembling the complete shelter under calm conditions verifies that the repaired pole bends evenly and supports the rainfly without odd distortion. Inspect the repair site under full tension to confirm that sleeves, tape, or replacement sections seat flush without creaking. Taking this precautionary step guarantees that your shelter remains dependable when adverse mountain weather rolls in.
Handling a fractured tent pole does not have to ruin an otherwise enjoyable camping adventure. Packing a properly sized aluminum repair sleeve and quality tape gives you the capability to handle unexpected breaks right at camp. Back home, replacing the damaged segment and adjusting shock cord tension restores your tent to factory reliability. With a sound frame overhead, you can head into your next wilderness trip confident that your shelter will stand strong against the elements.



Write Your Review
No reviews yet. Be the first to share your experience!