


Setting up an improvised shelter transforms basic camping equipment into an adaptable barrier against harsh outdoor elements. Learning how to build a tent with a tarp gives campers unmatched versatility on the trail, whether coping with sudden downpours or saving pack weight on weekend treks. Modern rectangular and square tarps feature reinforced tie loops, water-resistant coatings like polyurethane, and durable fabrics that shed rain efficiently. Understanding how anchor points, ridgelines, and ground stakes work together helps create a dependable shelter across diverse terrain.
While standard freestanding tents offer pre-shaped structures, building a tarp shelter allows you to customize headroom, wind resistance, and ventilation based on current campsite conditions. Campers often compare these adaptable configurations to dedicated heavy duty water resistant camping setups when seeking maximum weather readiness. Choosing the right fabric weave, cordage, and pitching geometry ensures your improvised shelter stays secure during overnight storms. With a few foundational knots and proper site selection, any camper can pitch a weather-resistant haven in minutes.




Pitching Techniques and Practical Steps for Tarp Shelters
Tarp shelters provide adaptable weather protection when pitched with proper tension, structural support, and thoughtful site orientation. Unlike traditional freestanding tents that rely on rigid fiberglass or aluminum frames, an improvised tarp tent utilizes cordage, trekking poles, ground stakes, or surrounding trees to create a taut shelter. Mastering this skill gives campers the ability to adapt their living space to changing wind patterns, severe precipitation, and varying campsite layouts. A properly constructed tarp shelter sheds heavy moisture, provides ample airflow, and packs down small in a backpack.
The A-Frame Pitch for Balanced Storm Protection
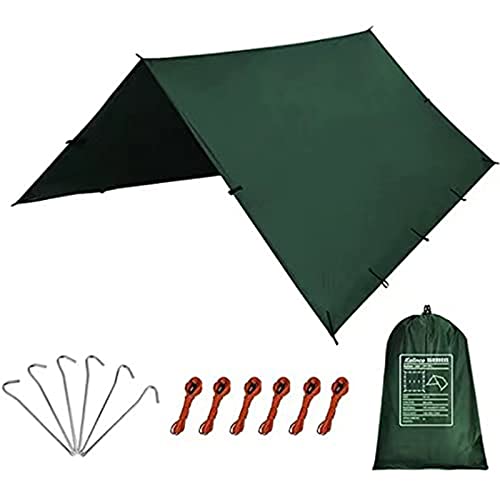
The classic A-frame pitch remains the most dependable configuration for heavy rainfall and moderate winds. Setting up this design requires suspending a taut overhead ridgeline between two trees or sturdy upright trekking poles. Once the center line of the tarp rests securely over the ridgeline, both sides slope downward symmetrically toward the ground. Securing the lower edges with guylines and ground stakes produces steep walls that quickly shed rain and prevent standing water from pooling on the roof.
Campers can easily adjust the height of the ridgeline depending on temperature and storm severity. A lower ridgeline positions the fabric edges flush against the ground, blocking driving wind and horizontal rain from entering the sleeping area. Raising the ridgeline several feet higher expands usable interior volume and encourages cross-ventilation during muggy summer outings. Square tarps, such as a ten-by-ten foot model with multiple perimeter tie loops, work particularly well for the A-frame because they provide balanced coverage on both sides.
The Lean-To and Flying Diamond Configurations for Wind and Rapid Setup
The lean-to pitch excels when camping in windy environments where precipitation blows from a predictable direction. This setup anchors one edge of the tarp directly to the ground while angling the opposite edge upward toward trees, poles, or overhead branches. The resulting angled wall acts as a solid windbreak while creating an open, welcoming porch on the leeward side. Campers frequently choose this configuration during mild weather because it permits unobstructed views and facilitates convenient campfire warmth reflection when positioned safely away from sparks.
The flying diamond, or diamond fly, offers an exceptionally rapid setup that requires only two primary anchor points. Suspending the tarp diagonally along its centerline creates a diamond profile with high peaks at the front and rear. Pulling the two opposite side corners downward to the ground forms angled protective flaps that cover sleeping bags or suspended hammocks. This configuration sheds precipitation quickly along its steep diagonal bias, making it a favorite for unexpected afternoon squalls.
Ground Moisture Defense and Floor-Forming Pitches
Standard flat tarps do not inherently possess an integrated floor, which leaves occupants exposed to damp soil, mud, and ground runoff. Creative configurations like the C-fly solve this problem by folding a portion of the fabric flat against the ground before elevating the remainder into a roof. The folded ground section acts as a built-in footprint that protects sleeping pads and sleeping bags from rising moisture. Staking down the lower corners firmly keeps the floor in place while the overhead canopy extends forward to deflect falling rain.
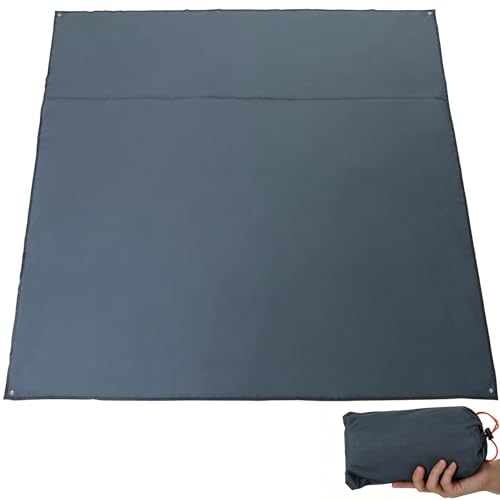
Campers can also pair their overhead tarp canopy with a dedicated ground sheet to achieve reliable moisture protection. Utilizing a dedicated ground layer, such as a ripstop polyester footprint under the sleeping area, prevents dirt and moisture from seeping upward through ground fabrics. The ground cloth should always remain completely beneath the overhead drip line of the tarp. Allowing edges of a ground sheet to stick out past the tarp perimeter will inadvertently catch dripping rain and channel pooled water directly into your bedding.
Selecting Cordage, Ridgelines, and High-Tension Knots
A tarp shelter is only as stable as the cordage and knot systems that hold it suspended. High-tensile utility cord, braided reflective paracord, and specialized nylon cordage provide the strength needed to resist sudden wind gusts without snapping. Setting a tight structural ridgeline requires knots that allow you to adjust and maintain high tension throughout the night. A trucker’s hitch on one anchor tree provides mechanical advantage to pull the line rigid, while a bowline knot creates a secure non-slip loop on the opposite anchor.
Connecting the tarp directly to the suspended ridgeline requires sliding friction knots like prusik loops or taut-line hitches. Tying prusik loops onto the main ridgeline and clipping them to the tarp’s center tie-outs lets you pull the fabric taut along its entire length. These friction hitches slide easily during the initial pitching process, but bite firmly into the ridgeline under lateral tension. This mechanism prevents the fabric from sagging inward toward the center, ensuring consistent water runoff during torrential rain.
Staking Techniques and Secure Ground Anchors
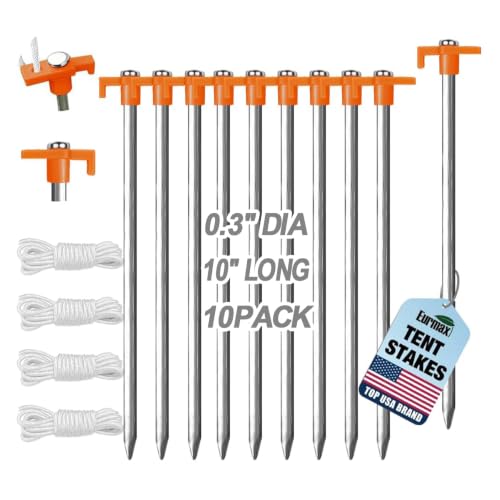
Driving stakes into diverse outdoor terrain demands proper technique to prevent tension failure during heavy winds. Stakes should be driven into the earth at an angle of roughly forty-five degrees sloping away from the direction of pull. This angled placement utilizes the surrounding soil density to resist the uplifting force exerted by taut guylines. Aluminum tri-beam stakes and sturdy metal spikes offer dependable holding power in standard forest loam, compact dirt, and gravelly campsite ground.
Sandy soil, loose mud, or solid bedrock requires alternative anchoring techniques when standard stakes pull loose. In sandy or snowy ground, tying guylines around buried sticks, rocks, or gear sacks creates deadman anchors that hold firmly beneath the surface. When pitching atop solid granite or flat rocky shelves, looping lines around heavy boulders provides reliable stability without ground penetration. Always adjust line tension evenly around the shelter perimeter to distribute aerodynamic loads across all anchor points rather than overloading a single corner.
Material Properties, Water Resistance, and Reinforcement Details
The fabric composition of a camping tarp dictates its packability, structural durability, and overall weather resistance. Common tarp fabrics include polyester varieties like 210T ripstop as well as heavier oxford weaves like 210D and 420D cloth. Lighter 210T polyester materials pack down small and resist stretching when wet, which helps maintain tight pitching tension overnight. Heavier oxford fabrics provide increased resistance to abrasion, sharp branches, and punctures, though they carry additional weight in a backpack.
Waterproof coatings and seam treatments are essential indicators of how well a tarp will perform during prolonged storms. Polyurethane coatings, typically designated by millimeter ratings such as 1000mm, 2000mm, or 3000mm, measure how much water pressure the fabric can withstand before leaking. A central taped seam is crucial on multi-panel tarps, as stitched fabric holes will readily seep water if left unsealed. Reinforced webbing tie loops distribute tension far more effectively than basic stamped metal grommets, reducing the risk of fabric tears under sudden wind shear.
Condensation Management and Internal Airflow Control
Condensation is a natural physical process that frequently affects single-wall tarp shelters in humid or cool conditions. Human respiration and ground moisture release warm water vapor into the air, which condenses against cold tarp fabric during overnight temperature drops. While completely preventing moisture buildup is impossible in damp climates, maintaining deliberate airflow prevents condensation from accumulating into dripping droplets. Angling the pitch to allow a gentle breeze through the upper ridge keeps moisture moving outward rather than gathering overhead.
Pitch geometry directly influences how effectively interior moisture behaves when condensation inevitably forms. A steep canopy angle causes running condensation to roll harmlessly down the fabric walls toward the ground instead of dropping straight down onto sleeping gear. Raising the lower shelter edges a few inches off the ground introduces low-level ventilation without compromising overhead rain defense. Wiping down the interior with a lightweight synthetic pack towel before packing up ensures you do not roll trapped moisture into your gear bundle.
Tarp Shelters Compared to Traditional Freestanding Tents
Tarp shelters offer exceptional weight savings and modularity, but they require greater pitching skill than pre-formed camping tents. Campers who prioritize expansive headroom, dedicated gear vestibules, and integrated insect netting often prefer spacious outdoor tent options for extended family trips or basecamp adventures. Tarp setups lack built-in mesh walls, making them less suitable for buggy lowlands unless paired with a separate bug bivy or perimeter netting. However, a minimalist tarp provides unrivaled freedom to craft custom shelters tailored to specific tree spacing and ground contours.
Campers who want rapid bad-weather protection without managing complex knots frequently choose easy setup camping tents as straightforward alternatives. Freestanding tents pop into shape using integrated pole structures, whereas a tarp requires finding solid anchors, tuning guyline tension, and assessing wind angles. Even so, carrying an ultralight tarp alongside a traditional tent remains a popular tactic among experienced backpackers. The tarp can serve as a camp kitchen awning, gear staging cover, or temporary emergency rainfly if unpredictable weather strikes the trailhead.
Campsite Selection and Storm-Readiness Strategies
Proper site selection is the most critical factor in determining whether your improvised tarp tent survives severe weather. Never pitch a tarp beneath dead overhanging branches or unstable trees that could break during high wind storms. Look for slightly elevated, well-draining ground that slopes gently away from your sleeping platform to avoid pooling water. Pitching in a natural depression or dry creek bed is dangerous because sudden flash runoff can quickly flood your floorless shelter.
Aligning your tarp shelter relative to the prevailing wind protects the entire structure from catastrophic failure. The lowest, most aerodynamic point of your pitch should face directly into oncoming wind gusts to deflect air currents over the roof. A broad, high opening pointed into the wind acts like a parachute, generating massive aerodynamic lift that can pull stakes straight out of the ground. Taking several minutes to evaluate wind directions and local terrain features before stringing your ridgeline ensures a peaceful, secure night under the stars.
Maintenance, Cleaning, and Proper Storage Practices
Proper post-trip maintenance guarantees that your camping tarp maintains its water-shedding performance and fabric strength for many seasons. After returning home, unfold the tarp fully and wipe away trail grime, pine sap, and mud using a soft sponge and lukewarm water. Avoid harsh detergents or machine washing cycles, as aggressive agitation can strip away delicate polyurethane coatings and ruin seam tape. Inspect webbing tie-outs, grommet edges, and guylines for subtle fraying or seam stretching that might require minor stitching repairs.
Never store a camping tarp while it remains damp or packed tightly into its compression sack. Storing moist polyester or nylon fabrics promotes mildew growth, weakens waterproof coatings, and produces unpleasant sour odors that are difficult to eliminate. Hang the tarp in a shaded, well-ventilated garage or dry indoor room until every seam and guyline is bone dry to the touch. Once dry, store the fabric loosely folded in a breathable storage bag away from extreme heat, direct sunlight, and sharp gear edges.
Building an effective tent using a tarp combines simple geometry, dependable knots, and attentive site evaluation. Whether setting up an A-frame during steady rain, pitching a lean-to against shifting winds, or deploying a diamond fly for quick canopy cover, this shelter skill builds outdoor self-reliance. Always verify that your ridgelines stay taut, your ground stakes hold firm, and your fabric clears damp ground runoff before settling in for the night. With quality waterproof materials and sound pitching habits, a tarp becomes one of the most reliable and lightweight shelters you can carry outdoors.




Write Your Review
No reviews yet. Be the first to share your experience!