


Setting up shelter after a long hike or drive can quickly become stressful when an unexpected gust of wind or an accidental trip bends a frame section. Knowing %how to fix a bent tent pole% helps ensure that a deformed frame does not ruin an entire camping trip. A distorted pole weakens the structural tension of the canopy, prevents the rainfly from shedding water properly, and puts undue strain on the tent seams. Understanding whether an aluminum or fiberglass rod can be salvaged in the field or requires bench repair prevents further breakage during your outings.
Even high-quality shelters designed as weather resistant camping tents can suffer frame distortion under sudden stress or improper pitching. Addressing a bend immediately keeps the tent stable and avoids puncturing delicate rainfly fabrics. Campers can choose between temporary sleeves, emergency splints, and full segment replacements depending on where the damage occurred. With the right technique and basic repair hardware, restoring a functional curve to your frame is a straightforward task.




Practical Solutions for Straightening, Splinting, and Replacing Damaged Tent Poles
Tent poles endure substantial continuous flex whenever a shelter is pitched, maintaining canopy tension and supporting rain protection. When high winds, falling tree branches, or accidental footing deform a section, the integrity of the entire structure is compromised. Addressing the damage promptly keeps the tent frame balanced and prevents secondary tears in fabrics or mesh sleeves. Understanding how to apply immediate field splints or perform permanent rod replacements will restore your gear for many seasons to come.
Evaluating Pole Materials: Aluminum Versus Fiberglass Damage
Determining the material of your damaged pole dictates the exact repair options available to you. Most modern lightweight camping and backpacking shelters use anodized aluminum alloy rods, such as 7001 series aluminum, which provide high strength while tolerating deliberate curvature. Aluminum deforms by bending, yielding under excessive load before it snaps, which sometimes allows for careful straightening if the metal is not creased. Inspecting the surface for micro-fractures helps confirm whether the segment can be salvaged safely.
Fiberglass poles behave very differently under structural stress because they consist of bundled glass fibers set within resin. When fiberglass flexes beyond its structural threshold, it does not simply bend; it splinters, splits lengthwise, or fractures completely into sharp shards. You should never attempt to bend a damaged fiberglass pole back into position because the internal structural matrix is already ruined. Damaged fiberglass sections must be bridged with a durable repair sleeve or discarded in favor of replacement segments to avoid injury from glass splinters.
Emergency Field Repairs Using Repair Splints and Sleeves
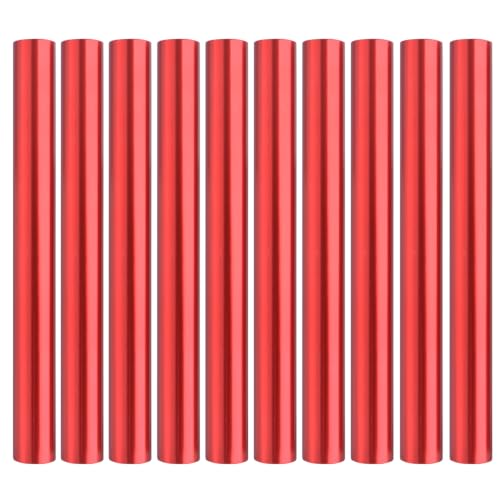
When a pole bends or crimps at a remote campsite, an emergency repair splint offers the fastest way to stabilize the frame. Repair splints are hollow metal tubes with an inner diameter slightly larger than the outer diameter of standard tent poles. The MSR Tent Pole Repair Splint Field Repair Sleeve provides a 13.8 millimeter inner diameter and a 16 millimeter outer diameter, making it suitable for larger poles often found on two to four person shelters. Similarly, the TRIWONDER Tent Pole Repair Splint Repair Kit offers tubes engineered for pole diameters between 7.9 and 10.5 millimeters.
To install an emergency repair splint, first relieve tension on the pole by carefully unclipping the tent body and taking down the frame. If the pole is bowed gently, slide the repair sleeve directly over the affected segment until the bent area sits squarely in the center of the sleeve. For poles equipped with smaller diameters, options like the GEAR AID Tent Pole Splint are available in dedicated half-inch and five-eighths-inch versions, fitting poles up to eleven millimeters or thirteen and a half millimeters respectively. Having the proper sleeve diameter ensures the splint will not slide loosely over the damage.
Once the repair tube is centered over the damaged portion, wrap several layers of heavy duct tape or repair tape around both ends of the splint. The tape prevents the sleeve from shifting along the rod when the pole is flexed back into the tent grommets. If the bend is severe and prevents the sleeve from sliding past the kink, gently ease the angle flat using hands or smooth rocks just enough for the sleeve to pass. Never force a tight sleeve over a jagged burr, as doing so can gouge the repair tube or cut your fingers.
Step-by-Step Method for Straightening Bent Aluminum Poles
Straightening an aluminum tent pole requires patience and gentle, gradual force because aluminum undergoes work-hardening when deformed. When aluminum bends, the metal molecules compress on one side and stretch on the other, creating localized weakness. Forcing a cold bend back into shape too quickly almost always results in a complete snap or a deep structural crease. Working slowly reduces the risk of shearing the thin metal walls.
Begin by warming the damaged aluminum section between your hands or in ambient warmth to reduce metal brittleness. Place the bent pole segment against a firm, curved surface such as a smooth log, a wooden workbench edge, or the sole of a sturdy camp boot. Apply slow, even pressure on either side of the bend with your thumbs positioned directly behind the apex of the curve. Work along the curve incrementally rather than focusing all corrective pressure on a single point.
Check the alignment after each gentle adjustment by sighting down the length of the pole segment. The goal is not to restore factory-perfect straightness, but rather to remove the exaggerated kink that prevents the pole from fitting through fabric sleeves or flexing evenly. If the metal exhibits a visible sharp crease, stop bending immediately, as the tubing wall has collapsed. A creased segment has lost its load-bearing capability and should either be reinforced with a permanent splint or swapped out for a fresh replacement segment.
Working with Internal Shock Cord During Pole Disassembly
Most modern tent poles are strung together using an elastic internal shock cord that keeps sections grouped in order. Replacing a single broken or permanently bent segment requires releasing tension on this elastic cord without letting it snap back into the tubing. Modern shelters, including easy setup tents, rely heavily on smoothly linked pole sections to ensure rapid pitching in changing weather conditions. Keeping the cord intact ensures rapid reassembly once repairs are finished.
To disassemble the pole safely, locate the end tip of the pole assembly, which is usually held in place with a threaded plug or a simple knot. Pull the end tip away from the tube until the knot in the elastic cord emerges, then secure the exposed cord with a locking clamp, binder clip, or pair of locking pliers. Clamping the cord prevents the elastic tension from retracting into the neighboring sections while you untie the retaining knot. This simple precaution avoids frustrating attempts to re-thread loose elastic through narrow tubes.
Once the knot is undone, carefully slide the unaffected pole sections off the cord one by one until you reach the damaged segment. Keep the removed sections organized in sequential order to preserve their proper orientation and ferrule alignment. After sliding the damaged piece off the cord, inspect the elastic strand itself for fraying, lost elasticity, or abrasion caused by jagged metal edges. If the cord remains in good condition, thread it through your new replacement segment before re-establishing proper tension.
Replacing Damaged Segments with Pre-Assembled Poles
When a bent pole cannot be safely straightened or when the metal wall has buckled, installing a fresh aluminum segment provides a permanent, factory-grade solution. Pre-assembled options such as the BRILLIANCE4U Aluminum Tent Pole Replacement kit provide complete sections made from 7001 series aluminum alloy. These poles feature a standard five-sixteenths-inch outer diameter, measuring approximately 7.9 millimeters, which suits many lightweight camping shelters. Swapping in a fresh section restores the full structural strength of the frame.
If your tent requires longer or thicker structural supports, poles such as the BRILLIANCE4U Pre-Assembled Aluminum Tent Pole offer twelve-foot lengths with an 8.5 millimeter outer diameter. When using a pre-assembled replacement rod, you must verify the exact segment length and total diameter against your tent’s original specifications. Using a pole with an incorrect diameter changes the frame stiffness and can distort the pitch of your shelter canopy. Checking compatibility beforehand ensures your rainfly fits properly without abnormal strain.
If the replacement pole section is slightly longer than the original damaged segment, you can trim the excess length using a standard mini tubing cutter or a fine-toothed hacksaw. Always measure twice and mark the cut on the open tube end rather than the inserted ferrule end. After cutting the metal, smooth both the inner and outer rim using a small metal file or sandpaper to remove sharp burrs. Removing burrs prevents the metal from slicing through the internal shock cord or tearing delicate tent fabric channels during setup.
Addressing Hardware and End Connectors
Structural pole repairs often require matching the correct terminal hardware where the pole locks into the tent perimeter. Connecting pole tips securely to corner webbing ensures consistent frame tension across large camping shelters, including spacious camping tents designed for family outings. If your original pole assembly utilizes male-end pins while your tent base requires female sockets, connector hardware bridges the difference. Maintaining firm corner anchors prevents wind from lifting the shelter off the ground.
Components like the BRILLIANCE4U 2 Holes Tent Pole Male to Female converter buckles resolve fitting mismatches between various pole tips and tent floor stakes. Made from high-density plastic, these two-hole fittings accept standard pole tips in one aperture while providing a dedicated anchor hole for ground pegs. Verifying that male tips fit snugly into corner eyelets prevents sudden slippage that can exert asymmetric torque on nearby pole sections. Reliable connection points keep your rainfly and canopy taut throughout heavy storms.
In addition to end adapters, examine the metal insert ferrules that connect adjacent pole sections together. Ferrules must sit tightly within the adjoining tube without wobbling or sliding past their design stop. If a ferrule is loose, apply a drop of high-strength epoxy or wrap thin electrical tape around the base to anchor it firmly. A secure ferrule connection eliminates localized bending moments where pole segments meet under tension.
Inspecting Repaired Poles and Stress Testing the Frame
After completing your field repair or bench replacement, a thorough inspection under realistic pitching conditions is essential before packing the tent for an excursion. Assemble the entire pole assembly on level ground and visually scan along the length of the arch. Look for any irregular flat spots, wobbling joints, or sharp metal edges that could snag fabric sleeves. Making sure the joints lock together cleanly confirms that the internal shock cord tension is correctly balanced.
Next, pitch the tent completely, including attaching all pole clips, tensioning corner webbing, and staking out the rainfly. Observe the natural curve of the repaired rod to confirm that the arc mirrors the opposing pole assembly. The apex of the shelter should form a balanced, symmetrical dome or tunnel profile without leaning awkwardly toward the repaired side. If the repaired section forms an unnatural kink, release the tension immediately to adjust the splint or replace the segment before heading into windy conditions.
Best Practices to Prevent Tent Pole Bends and Failures
Preventing future pole damage starts with mindful pitching habits and proper campsite handling. The most common cause of bent tent poles is flexing the frame before every ferrule is fully seated inside its adjacent section. When a ferrule is partially inserted, the bending force concentrates on a tiny lip of metal, causing the tubing wall to flare, split, or crimp instantly. Always verify that every joint is completely flush before bending the pole to insert it into corner grommets.
Environmental factors such as gusty crosswinds can also over-stress pole sections if the shelter is not properly anchored. Whenever inclement weather threatens your camp, stake out all perimeter guylines securely to distribute wind energy across the entire tent fabric instead of leaving the poles to absorb the full force. Additionally, avoid letting camping companions or gear step on disassembled pole bundles lying on the ground. Taking care during setup and packing preserves the elastic tension and structural temper of your poles across countless camping adventures.
Carrying a dedicated repair sleeve and a small roll of heavy-duty duct tape inside your tent stuff sack guarantees you are always prepared for accidental damage. Routine maintenance, such as wiping down aluminum segments to remove abrasive grit and drying components before long-term storage, keeps joints sliding freely. With basic diagnostic skills and the right replacement parts, keeping your tent poles straight, functional, and reliable remains a simple and achievable task for any camper.


Write Your Review
No reviews yet. Be the first to share your experience!