


Pitching a shelter in rough backcountry weather puts continuous mechanical stress on structural frames, and a sudden snap or splintered segment can quickly compromise your outdoor trip. Learning how to repair fiberglass tent pole failures allows campers to salvage their shelter immediately rather than packing up early or discarding otherwise functional gear. Whether dealing with longitudinal cracks from high wind gusts or severed internal shock cord from extended use, basic field fixes keep your campsite stable. Preparing with suitable repair components ensures that even unexpected structural damage on heavy-duty water-resistant camping tents does not cut an expedition short.
Fiberglass remains a common pole material across recreational family tents and lightweight outdoor shelters due to its natural flexibility and accessible manufacturing cost. Overflexing, improper joint seating, and exposure to prolonged seasonal wear can cause hollow rods to fray, split, or shatter at the metal ferrule connections. Addressing these structural issues involves identifying whether a temporary metal splint, a localized tape wrap, or a full segment replacement with fresh elastic cord offers the safest solution. Understanding the right materials, diameters, and assembly techniques preserves the tension of your tent frame while keeping outdoor shelters secure against unexpected mountain winds.


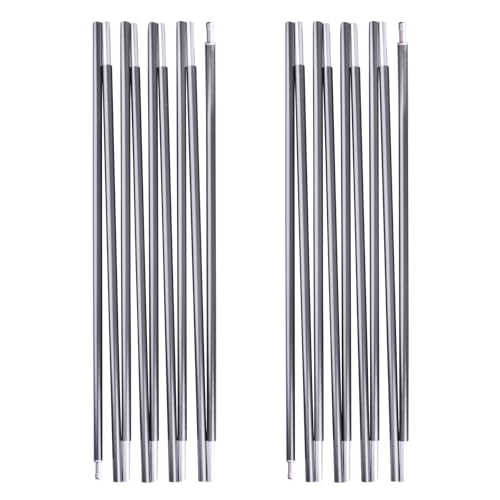


Restoring Broken, Cracked, and Splintered Fiberglass Tent Poles
A broken tent pole does not mean your camping trip is over or that your entire tent must be discarded. Fiberglass poles rely on hollow, resin-bonded fibers held under constant tension by internal elastic cord, making them flexible yet susceptible to splintering under sharp bending forces. Understanding how to repair fiberglass tent pole sections involves choosing between an immediate field splint, replacing a shattered rod, or rethreading fresh shock cord through the frame. With a modest repair kit and careful attention to segment diameters, you can restore structural stability and return your tent to active service.
Diagnosing Common Fiberglass Pole Failure Modes
Structural failures in fiberglass poles generally fall into three distinct categories: splintering, complete snapping, and shock cord decay. Splintering occurs when the outer resin matrix cracks along the rod, releasing tiny glass needles while the pole remains partially intact. This often happens when a pole bends past its normal radius during intense wind or when someone forces a tight pitch. If left unaddressed, splintered segments quickly progress to total failure as tension concentrates on the weakened fibers.
A clean fracture usually takes place at or directly adjacent to the metal connector sleeve, also known as the ferrule. When pole sections are not inserted completely into the ferrule before pitching, the hollow edge crushes against the metal rim under bending stress. This creates an uneven load point that shears the rod cleanly in two. In many cases, the jagged edges also sever the internal elastic shock cord inside the tube.
Shock cord degradation represents a less catastrophic but equally frustrating failure. Elastic bungee cords lose their elasticity over time due to heat, dry air, and continuous tension during storage. A slack cord allows individual segments to unseat slightly while you are sliding the assembly through tent fabric sleeves, creating immediate bending hazards at the joints. Inspecting the poles before each outing helps you catch loose ferrules, cracked edges, and stretched shock cord before they fail on the trail.
Temporary Field Repairs Using Repair Sleeves and Splints
When a pole breaks far away from gear shops, an emergency pole sleeve provides the fastest temporary fix. A repair sleeve is a slightly oversized metal or plastic tube designed to slide directly over the damaged section. Bundles such as the Yamusedy tent pole repair kit supply these hollow metal tubes specifically for rapid field intervention without requiring pole disassembly. To begin the fix, straighten the broken pole ends and push any frayed fiberglass strands back into line as closely as possible.
Slide the metal sleeve along the rod until it sits centered directly over the fracture point. You need equal lengths of the repair tube supporting both sides of the break to distribute bending stress evenly across the joint. If the break has sharp splinters, wrap a single layer of duct tape tightly around the splintered area first to compress loose fibers. Avoid building up excess bulk so the sleeve can slide into position.
Once the sleeve is centered, anchor both ends securely in place with several tight wraps of heavy-duty repair tape. Wrap the tape from the sleeve onto the fiberglass rod so the collar cannot slide away when the pole flexes into an arch. This quick field patch restores enough rigidity to keep your rainfly elevated through the night. Pitch your shelter gently afterward to avoid putting unnecessary stress on that repaired corner.
Complete Segment Replacement and Measuring Outer Diameters
A splinted pole is only a temporary patch, so replacing the broken segment entirely provides a lasting repair. To start, you must determine the exact outer diameter of your existing poles. Standard replacement sets, including options from FENGKONG and Tydurholy, frequently feature 7mm, 8mm, or 8.5mm outer diameters designed to match common dome tents, while large family cabin frames may use thicker rods. Selecting the correct diameter ensures your poles bend symmetrically without creating localized weak points.
Always measure the outer diameter using a caliper or a precise millimeter ruler across the fiberglass rod rather than the metal ferrule. If you purchase a replacement section that is even one millimeter too thick, it will not slide through the tent sleeve or fit into ferrule joints. An undersized segment will wobble inside the connector, creating pinpoint stress that invites another fracture. Confirm whether your original pole uses attached female ferrules before ordering parts.
Cutting a replacement fiberglass rod to match your original segment length requires basic safety precautions and simple tools. Always wear protective work gloves and safety glasses to shield your skin and eyes from fine glass dust. Mark the exact length of the original broken rod onto your new blank segment using masking tape. Cut slowly with a hacksaw, then smooth the cut edge with sandpaper so it cannot fray the shock cord.
Restringing and Tensioning Tent Pole Shock Cord
Replacing a snapped segment or rebuilding an entire pole line requires restringing the internal elastic shock cord. Standard tent shock cord is typically 1/8-inch in diameter, built with an elastic rubber core protected by a woven synthetic jacket. Complete restringing bundles, such as the FENGKONG heavy-duty shock cord replacement kit, provide generous lengths of bungee cord alongside flexible threading wire and metal stop washers. Having a dedicated lead wire makes routing the elastic through long hollow rods significantly easier.
Begin by laying all pole sections on a flat surface in their exact assembly sequence, making sure all ferrules face in the same direction. Secure one end of the new shock cord by threading it through a metal washer and tying a secure double overhand knot. Insert the other end, attached to your thin steel guide wire, through each consecutive fiberglass rod and ferrule until the cord emerges from the far end. Work methodically to prevent the cord from twisting inside the narrow channels.
Achieving the correct cord tension is crucial for smooth assembly at the campsite. Your shock cord should measure roughly two-thirds to three-quarters the total length of the assembled pole line when unstretched. Pull the free end of the elastic cord taut until you feel firm resistance, holding each segment snug against its neighbor. Slip another metal washer onto the tensioned cord, tie a tight stop knot, and trim any excess cord leaving a short safety tail. Test the assembly by folding and unfolding the segments to ensure they snap together cleanly.
Repairing and Replacing Ferrules and Angled Ridge Connectors
The metal ferrules that link fiberglass segments together endure substantial leverage every time your tent flexes in the wind. If a ferrule bends, cracks, or pulls loose from its fiberglass host rod, the entire pole assembly loses its structural alignment. When a ferrule separates cleanly from the rod without damaging the fiberglass, clean out any dried adhesive from inside the metal sleeve. Apply a thin coating of epoxy to the rod end, press the ferrule firmly into place, and let it cure completely before restringing the pole.
Some modern tent architectures, including modified dome and tunnel frames, rely on pre-bent connectors to achieve steep sidewalls and maximum interior headroom. When these rigid corner pieces crack, straight repair sleeves will not work. Angled fittings, such as MOPSHE galvanized iron curved connectors, are specifically designed to join fiberglass rods at fixed angles for ridgelines and awning brackets. Matching the inner diameter of the angled connector to your fiberglass segments prevents joint slippage under tension.
When installing an angled connector or ferrule, inspect the seating depth to ensure the fiberglass rod bottoms out completely inside the socket. An incomplete seat leaves an internal gap that multiplies torque forces against the thin metal wall. If a ferrule splits along its seam during a storm, replace it before the next trip. Maintaining proper ferrule integrity ensures that even easy-setup camping shelters maintain their tensioned aerodynamic profiles in shifting winds.
Upgrading vs. Repairing: When to Switch to Aluminum Poles
While repairing fiberglass poles is inexpensive and straightforward, certain camping scenarios make switching to an aluminum replacement frame a smarter investment. Fiberglass poles offer solid flexibility for mild weather, but they become brittle in freezing temperatures and splinter under sudden shock loads. In contrast, aircraft-grade aluminum poles, such as TRIWONDER 7001 aluminum alloy replacement sets, bend under extreme wind loads rather than shattering into dangerous fibers. Aluminum also trims total pack weight for backpacking trips.
If your tent fabric, floor, and zippers remain in excellent condition but your fiberglass poles have broken multiple times, a full aluminum upgrade revitalizes your shelter without buying a new tent. Aluminum poles use swaged interlocking joints that create a slimmer profile and slide effortlessly through pole sleeves. You can adjust aluminum pole sets to your tent dimensions by removing individual segments or trimming sections with a mini tubing cutter. This upgrade provides reliable durability for demanding environments.
Consider the structural demands of larger shelters before deciding on pole materials. Large family tents and spacious outdoor group tents experience high wind resistance due to their tall, upright fabric walls. When strong gusts strike tall vertical panels, fiberglass poles flex deeply, sometimes transferring excessive stress onto corner seams and stakes. Upgrading main structural arches to aluminum or keeping reinforced fiberglass sections properly maintained preserves the structural envelope and prevents midnight collapses.
Pitching and Maintenance Habits That Prevent Broken Poles
Preventing pole damage begins with how you handle your gear during campsite setup and takedown. The single most common cause of cracked fiberglass poles is failing to seat each section completely into its ferrule before arching the pole. When a segment is partially engaged, the edge of the fiberglass bears the entire leverage of the bend, instantly crushing the hollow tube. Form a habit of checking every joint by hand before inserting pole tips into corner grommets.
Always push tent poles through fabric sleeves rather than pulling them. Pulling a pole line puts tension on the internal shock cord, causing sections to separate inside the fabric sleeve and catch on delicate seams. Pushing keeps all segments firmly seated against their ferrules while sliding smoothly through the channel. When taking down your tent, fold segments from the center of the pole toward the ends to distribute elastic tension evenly and extend shock cord lifespan.
Proper campsite guyline technique also shields fiberglass frames from unexpected breaking stresses. Guy lines are not meant to yank the tent out of square, but rather to stabilize the frame against buffeting wind gusts. Secure guylines at a 45-degree angle from the pole seams and adjust tension sliders so the lines remain taut. Inspect your poles whenever you clean and dry your tent after a camping trip, wiping down rods to remove abrasive grit.
Post-Repair Testing and Safe Field Verification
Before packing your repaired tent poles for your next outdoor excursion, always conduct a thorough test pitch in your backyard or a nearby park. Assembling the full pole frame and bending it gently into its working arc confirms that your replacement segments, ferrules, and shock cord tension function as expected. Run your gloved fingers lightly over the rods to detect any hidden stress cracks or rough spots that could snag tent fabrics during setup.
Verify that the repaired pole inserts smoothly into your tent corner grommets without requiring excessive force. If the pole feels noticeably stiffer or longer than its companion frame, measure the total overall length against the original unbroken pole and adjust segment lengths accordingly. Packing a small maintenance kit containing spare shock cord, a repair sleeve, and heavy-duty tape in your tent bag provides continuous peace of mind. Taking time to inspect your tent frame ensures reliable shelter across every camping season.


Write Your Review
No reviews yet. Be the first to share your experience!