


Tent frames endure substantial wind tension and repeated flexing during every trip, making structural failure an occasional reality at the campsite. When a fiberglass section splinters or an elastic cord loses elasticity, discovering how to repair tent pole assemblies keeps your shelter functional without requiring a costly whole-tent replacement. Understanding the basic mechanics of segmented poles allows campers to diagnose joint friction, replace internal lines, and restore frame stability before minor cracks lead to a collapsed canopy.
While modern designs such as easy setup tents reduce assembly complexity, their flexible frame segments still rely on proper tension and intact structural ferrules. Carrying simple repair supplies and knowing the distinction between quick trailside splints and permanent segment rebuilds ensures that outdoor plans remain safe and dependable. This guide walks through the inspection steps, restringing techniques, and pole section replacements needed to keep your tent upright in changing weather.

Pros
- Includes everything needed for repair: four pole sections, metal ferrules, shock cord, and installation wire
- Cost-effective solution that extends the life of family dome tents
- Fiberglass material provides good flexibility and reliable tension against breezy conditions
- Compact pack size makes it an ideal emergency repair kit to keep in a camp trunk or car bin
Cons
- Requires careful measuring and a hacksaw if your tent uses shorter custom pole segments
- Heavier and less rigid than premium DAC aluminum poles
- Limited strictly to tents requiring 11mm diameter poles
A sudden crack or snap in a fiberglass tent pole during setup or in the middle of a windy storm can bring a weekend outdoors to an abrupt halt. The Stansport 11mm Tent Pole Replacement Kit is a practical, field-ready repair solution designed to rescue damaged dome tent frames. Rather than retiring a perfectly functional shelter due to a single splintered section, this kit delivers four replacement fiberglass poles, attached ferrules, elastic shock cord, and an installation wire to restore structural integrity.
This kit is best suited for family campers, car campers, festival goers, scout troops, and budget-conscious outdoor enthusiasts who prefer repairing gear over replacing it. Stashing an extra repair kit inside a camp tote or car trunk provides valuable reassurance, particularly when setting up camp after dark or weathering gusty winds miles away from the nearest outdoor outfitter.
Tent poles provide the skeletal backbone that keeps your rainfly taut, maintains peak headroom, and sheds rain efficiently. When a pole section breaks, the rainfly sags, pooling rainwater and risking leaks along seams. By swapping in sturdy 11mm replacement sections, campers can re-establish proper frame curvature and tension, ensuring the dome tent continues to handle moderate wind and rain reliably.
Based on product specifications, the kit uses resilient fiberglass sections designed to flex smoothly into the typical arch of a dome tent. The pre-attached metal ferrules make connecting sections simple, while the included elastic shock cord keeps everything aligned for quick pitching at the campsite. The included installation wire eliminates the frustration of trying to feed stretchy cord through long, narrow fiberglass tubes with makeshift tools.
Keep in mind that tent dimensions vary widely among outdoor brands. While each section measures approximately 26 inches, some campers may need to trim a pole section to match their original frame length. Trimming fiberglass requires a fine-tooth hacksaw and a wrap of masking tape around the cut to prevent splintering. Campers should also measure their existing poles with a caliper or ruler to confirm an 11mm diameter, as this kit will not fit ultralight backpacking tents designed for narrower aluminum poles.
For anyone wanting an affordable way to extend the lifespan of their family camping gear, this Stansport repair kit is a sensible addition to the garage workshop or emergency gear bin. It is a dependable, low-cost fix that ensures broken hardware never ruins a planned weekend under the stars.
Replacing a broken pole section with this kit is a straightforward DIY project that can be handled on the workbench or at the campsite picnic table. The included installation wire acts as a rigid guide, allowing you to pull the new elastic shock cord smoothly through the hollow center of each fiberglass section.
If your tent requires shorter segments, measure the damaged original section precisely against the new replacement. Wrap painters tape or masking tape firmly around the cut line on the fiberglass pole to keep the fibers from fraying, then trim cleanly using a fine-tooth hacksaw. Lightly sand the cut edge before threading the cord.
Tie a firm figure-eight knot at one end of the elastic cord, string each segment in sequence through the ferrules, pull sufficient tension into the line, and secure the opposing end. Having properly tensioned shock cord ensures fast, hassle-free tent assembly every time you pitch camp.
Fiberglass remains one of the most widely used pole materials for family and recreational dome tents due to its natural elasticity and economical cost. The Stansport replacement sections are engineered to provide the consistent flex required to maintain standard dome and cabin tent profiles without cracking under normal tension.
The zinc-plated steel ferrules are securely crimped to the ends of the poles, providing a snug coupling point that resists wobbling or slipping during windy gusts. When properly matched to your tent's original specifications, these replacement sections restore original structural rigidity, helping your rainfly shed morning dew and heavy precipitation effectively.


Practical Methods for Restoring Broken Tent Poles
Tent poles serve as the structural skeleton of any camping shelter, bearing continuous bending stress, wind loads, and fabric tension. When a pole splits or loses internal tension, the entire canopy can collapse or sag under light precipitation. Learning how to repair tent pole assemblies gives you the practical skill to fix field emergencies and perform workshop refurbishments. A systematic approach to inspecting joints, replacing stretched elastic, and fitting fresh sections will keep your shelter standing strong across seasons.
Distinguishing Fiberglass and Aluminum Pole Damage
Fiberglass poles appear frequently on family recreation tents and dome shelters, prized for their flexibility and low manufacturing cost. These poles typically fail by splintering lengthwise or cracking near the metal ferrule where stress concentrates. Handling cracked fiberglass requires caution because tiny, sharp filaments can easily pierce skin or shred tent fabrics. If a fiberglass segment exhibits vertical fractures along its body, structural rigidity is permanently lost and the piece cannot simply be glued back together.
Aluminum poles are standard on lightweight backpacking shelters and mountaineering tents due to their high strength-to-weight ratio. Aluminum segments rarely shatter like fiberglass; instead, they suffer from sharp bends, creased tubing, or fractured joint swages. Straightening a sharply crimped aluminum pole usually causes immediate metal fatigue, creating a hairline crack that fails under sudden wind. Recognizing whether a segment is extruded aluminum or hollow composite fiberglass determines the exact tools and replacement parts required for a dependable fix.
Backcountry Field Repairs with Emergency Splints
Field emergencies demand immediate stability so campers can remain sheltered overnight during unexpected storms. A hollow metal repair sleeve, commonly included with modern tents or outdoor repair kits, provides the fastest structural bridge over a fractured segment. Slide the sleeve directly over the break point, ensuring equal length covers both sides of the damaged area. Wrapping several layers of heavy-duty tape around both sleeve edges holds the splint firmly in place against shifting forces.
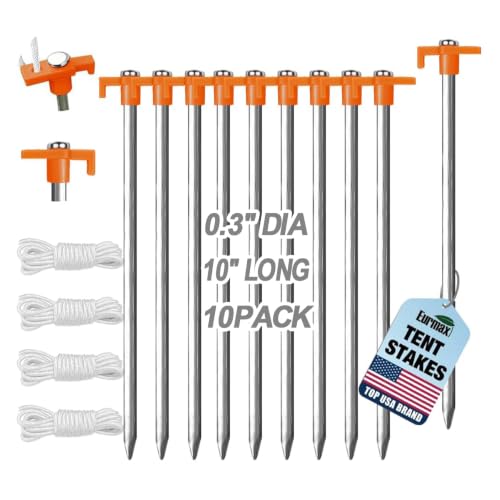
Improvised splints become necessary when a factory repair tube is unavailable in remote areas. Smooth aluminum tent stakes or sturdy wooden dowels can be lashed tightly against the broken section using duct tape or paracord. Make sure to wrap exposed fiberglass splinters or jagged aluminum edges thoroughly with tape before threading the pole back through the tent canopy. A rough, jagged edge will slice straight through lightweight rainflies and pole sleeves, causing expensive secondary damage to your shelter.
Essential Tools and Supplies for Tent Pole Restoration
Gathering the right supplies beforehand turns an intimidating pole repair into a quick, predictable workshop project. A basic repair kit should include replacement shock cord, a roll of durable friction tape, a length of stiff steel lead wire, and replacement pole segments matched to your tent specifications. Pliers with a wire-cutting notch help grip recessed ferrule washers and manipulate stubborn terminal knots inside narrow aluminum tubes. Having a fine-toothed saw or rotary cutter on hand ensures smooth, perpendicular cuts through dense composite materials without crushing hollow tube walls.
Safety equipment is equally important whenever you cut or file composite pole materials. Wearing safety glasses and work gloves shields your eyes and fingers from microscopic fiberglass slivers that easily float into the air during cutting. Working over a clean shop rag or drop cloth catches fine resin dust and discarded metal shavings, keeping your workspace tidy. Keeping these simple items organized in your camping gear bin ensures you can address unexpected frame damage immediately rather than scrambling for tools right before a scheduled weekend trip.
Diagnosing Slack or Damaged Internal Shock Cords
Internal shock cord keeps individual pole segments organized and pulls joints snugly into their respective ferrules during assembly. Over years of use, natural latex or synthetic elastic cores degrade from heat exposure, repeated stretching, and moisture. A worn shock cord loses elasticity, hanging loose inside collapsed poles and failing to draw the ferrules tightly together. When segments sit loosely without tension, ferrules can partially unseat during pitching, which quickly causes the pole wall to crack under bending stress.
Extreme cold weather also stiffens old elastic cords, causing them to freeze inside the hollow tube and refuse to retract. Checking internal cord tension before packing for a trip helps identify loose lines before you reach the campground. Inspecting the end sections often reveals fraying near the terminal knots or corroded retaining washers inside the tip ferrules. Replacing tired elastic cord is an affordable, straightforward maintenance task that restores the crisp, automatic joint alignment of a brand-new tent frame.
Step-by-Step Procedure for Restringing Shock Cord
Restringing starts by laying the pole out straight on a flat surface and unthreading the terminal end tips. Most poles secure the internal elastic cord using a metal washer, an internal cross pin, or a knotted loop lodged inside the end cap. Carefully pop the end tip free using pliers or push it outward using a thin screwdriver, exposing the retaining knot. Cut the old knot, remove the degraded elastic line completely, and discard it while keeping all pole segments lined up in their original order.
Measuring the replacement shock cord correctly ensures proper tension along the entire assembled pole run. A good guideline is to cut fresh elastic cord, such as standard one-eighth inch bungee line, to approximately seventy to eighty percent of the pole’s total assembled length. Dedicated supplies like the Chapou Tent Pole Repair Kit 200ft 1/8” Shock or the Hibinew Tent Pole Shock Cord 1/8 inch 60ft kit provide plenty of cord length along with steel lead wires to ease the threading process. Tie a secure double overhand knot at one end of the new cord and seat it firmly against the base washer.
Threading the new cord through long, narrow pole segments requires patience and a stiff guide wire. Attach the loose end of your elastic line to a steel threading wire, then push it through each segment sequentially, keeping all ferrules facing in the correct direction. Pull tension on the cord as you progress through each section, using a spring clamp or locking pliers padded with tape to hold the cord taut at each joint. Once the cord emerges from the final segment, stretch it to achieve firm tension, thread the terminal washer, and tie a permanent stopper knot before reseating the end tip.
Replacing Broken Fiberglass Pole Segments
Replacing a shattered fiberglass section requires matching the outer diameter and overall length of the original pole piece. Common family dome shelters frequently utilize pole segments measuring nine point five millimeters or eleven millimeters in diameter. Universal replacement options such as Stansport Tent Pole Replacement Kits supply fresh fiberglass sections alongside pre-attached metal ferrules, allowing campers to rebuild custom lengths. Never force a mismatched pole diameter into existing ferrules, as improper clearance will create severe pressure points that crack under wind deflection.
Cutting a replacement fiberglass pole to match your damaged segment demands clean workshop technique to avoid splintering the tube walls. Wrap the cut line tightly with masking tape to support the outer fibers, then mark your exact measurement on top of the tape. Cut through the tube using a fine-toothed hacksaw or rotary tool, rotating the pole slowly rather than forcing the blade straight down. Once severed, remove the tape and smooth the raw fiberglass edge with medium-grit sandpaper to eliminate burs that could abrade the internal shock cord.
Attaching the metal connector ferrule onto the newly cut segment completes the replacement component. Test fit the ferrule to ensure the raw pole end slides fully into the metal collar without binding or excessive wobble. Apply a small amount of multi-surface epoxy inside the ferrule collar if the manufacturer design relies on bonded joints rather than friction crimping. Allow the adhesive to cure completely before restringing the pole line, ensuring the metal ferrule remains permanently aligned during repetitive assembly and takedown.
Addressing Bent and Damaged Aluminum Tubing
Aluminum pole repairs require a different approach because metal tubes cannot be joined with standard slide-on fiberglass ferrules. If an aluminum segment suffers a gentle curve from excessive wind, gently pressing it against a curved wooden block may restore usable alignment. However, if the metal shows an angular crease or dent, attempting to bend it backwards will almost certainly snap the tube wall. Swapping out the creased tube with a factory-spec replacement segment is the only reliable long-term solution for maintaining shelter safety.
High-end aluminum poles often incorporate swaged insert tips where the tubing narrows down to slip into the adjacent section. Inspect these insert collars carefully after severe storms, as high lateral winds can flare or crack the receiver end. If the receiver lip has expanded, the joint will wobble and exert uneven leverage against the internal swage. Replacing individual aluminum sections promptly prevents cascaded damage across the entire connected frame structure during subsequent windy outings.
Verifying Frame Curvature and Structural Fit
Testing repaired poles before pitching your tent prevents embarrassing failures and canopy tears at the campsite. Assemble the entire pole run on a flat lawn and flex it slowly into an even, natural arc by holding both ends. Check that each ferrule joint seats flush against the tube shoulder without visible gaps, steps, or crooked angles. A properly restored pole bends into a continuous, uniform curve that distributes mechanical load evenly from end to end.
Structural integrity becomes especially crucial when you pitch shelters in demanding conditions. For example, heavy-duty water-resistant shelters experience heavy wind resistance and water accumulation that place severe loads on pole joints. Similarly, large family structures like spacious group camping setups rely on long, multi-segment pole runs that must maintain uniform shock cord tension to prevent joint slip under variable mountain gusts. Taking time to verify every ferrule connection ensures that your repaired pole can withstand unexpected storm gusts without buckling.
Proper Handling, Maintenance, and Storage Habits
Adopting smart breakdown habits significantly prolongs the service life of both fiberglass and aluminum tent poles. When disassembling your frame, always start uncoupling segments from the middle of the pole and work outward toward the ends. Breaking down poles from one end to the other stretches the shock cord unevenly, placing intense strain on the final elastic segments. Never allow pole sections to snap together violently under elastic tension, as the metal edges can easily chip fiberglass or dent aluminum ferrules.
Cleaning and storing poles correctly prevents corrosion, stuck ferrules, and dry-rotted shock cords. Wipe down each segment with a damp cloth after camping on sandy beaches or dusty terrain, removing grit that acts like sandpaper inside metal joints. Ensure pole tubes and internal channels are completely dry before storing them in stuff sacks, preventing trapped moisture from corroding metal collars or causing mildew on the elastic core. Storing tent poles in a climate-controlled environment away from extreme attic heat keeps internal rubber elastic springy and ready for future camping seasons.
Taking the time to service damaged tent poles restores shelter dependability without requiring expensive gear upgrades. Whether you perform a quick trailside splint or rebuild an entire segmented assembly with fresh shock cord, proper technique ensures frame stability in changing weather. Inspect your poles regularly, pack a compact repair sleeve in your emergency kit, and replace worn elastic promptly to enjoy dependable outdoor comfort on every adventure.




Write Your Review
No reviews yet. Be the first to share your experience!